Having explored the element of light, I will now move on to discuss the element of framing. In my view, I think what drags down amateur photography the most is poor angles or poor set ups, like shots with too much space, taken at the wrong height and with nothing in the background (don't worry we all started here).

As with my blog about light, I will break down Framing into three sections; Shot Height, Shot Framing and Shot Depth.
Shot Height
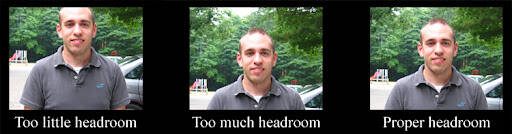
With shot height, I am focusing on head room and the angle of the shot. When exploring the correct use of head room in a shot, there is much less room for creativity, though as always there are exceptions to this rule. In the case of deciding how much head room is presented, generally, we want the top of the head to be positioned in the top sixth of the frame. This is so that there isn't any dead space at the top of the frame, which would make the composition weaker.
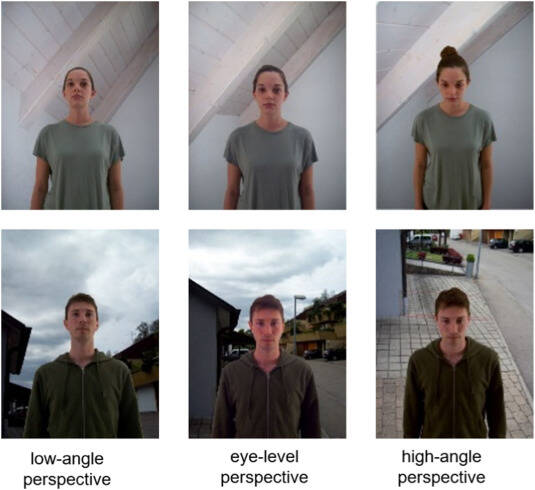
When considering shot angle, this is more pertinent for stills photography, as you have more freedom to exaggerate the angle which might not work in a narrative piece. Very rarely will you get a good photograph from your standing height because usually the composition will be uninteresting. It is important to find dynamic angles that accentuate and highlight the themes within the image and create a more engaging shot. For example, if you take a shot of a subject from above it implies a power dynamic. Taken from below and looking up at the subject reverses this power dynamic.
Shot Framing
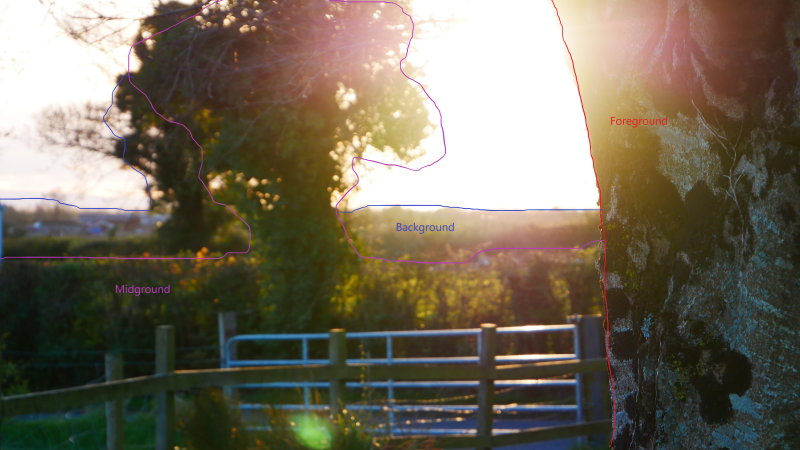
The first problem that often happens with amateur photographers when working with shot framing is that they shoot too wide, especially if they have expensive gear and they have an interesting location. This leads to a weak composition because there are no focal points, the viewer doesn't know where to look. The way to fix this is to divide the composition strictly into foreground, mid ground and background, meaning that the elements in the foreground are closer to the viewer. This helps to separate the different features in the composition and aids the viewer to differentiate whats important in the shot. With the elements in the foreground, apply all the rules regarding lead room, head room etc to make the target feature more pronounced. This should create a strong visual anchor for the rest of your image and provide a strong composition.
Shot Depth
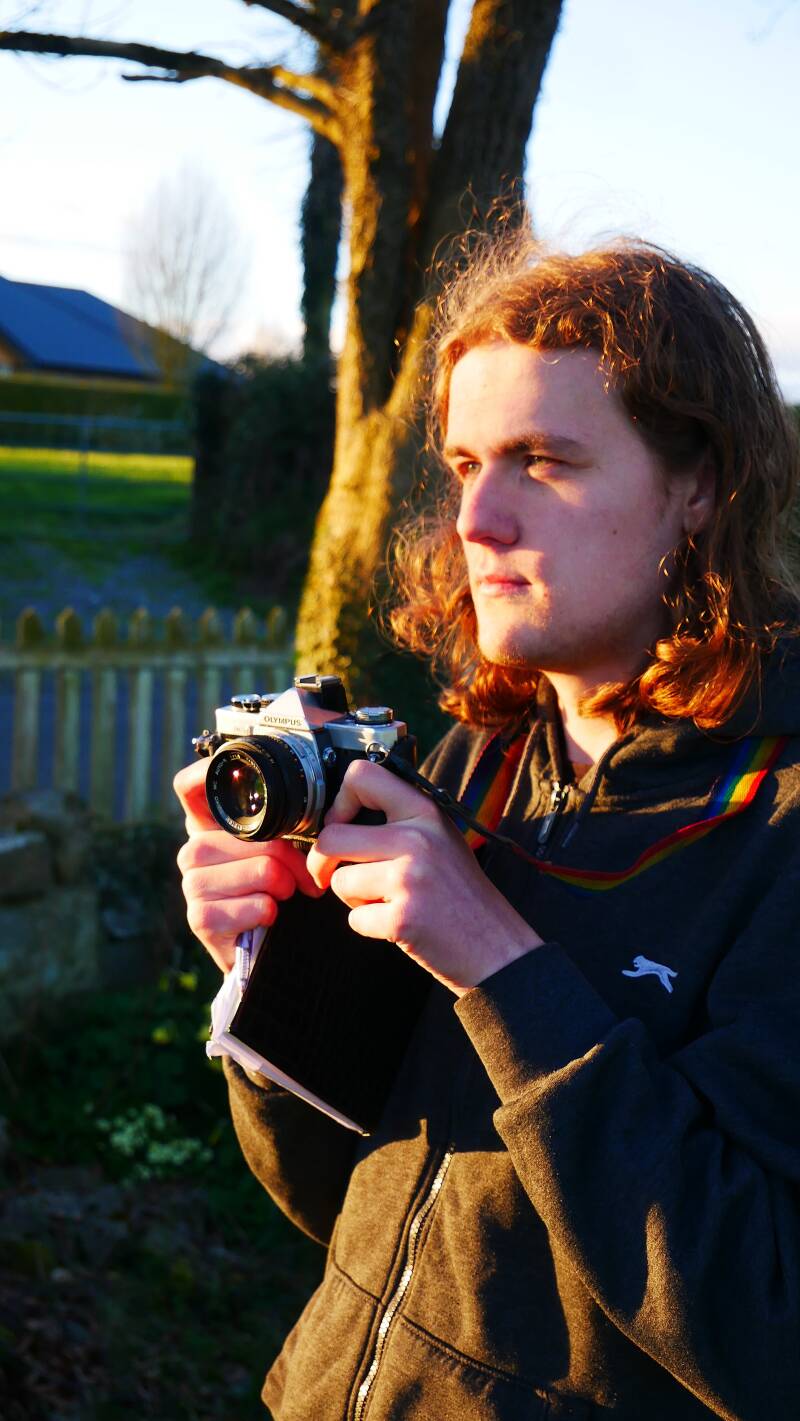
When shooting people in dialogue or talking to camera it is important to have an interesting backdrop behind them. The way we make an interesting background stand out is by using shot depth to add to the composition by making it more dynamic. A bad example of this could be shooting someone against a blank wall as this will produce a flat composition. In contrast, aim to shoot someone standing in front of a background which reflects significant information about their identity or topic of discussion and provides additional context for the image which is interesting. If you can't do this, at least use leading lines to guide the viewers eyes around the composition to create distance between them and the background.

Remember, when you are doing photography, keep experimenting with your medium and follow your interests. When you are interested in your project, what you produce will reflect your commitment and passion.
This blog is the second in a series which will explore different aspects of cinematography, so keep following my posts.
Create Your Own Website With Webador