I'm choosing to focus on and tell you about Cinematography, because unlike some other art forms, all the technical and aesthetic elements are right in front of your eyes.
Light is important in cinematography, as it is the medium by which images are taken. But the difference between an amateur cinematographer and an intermediate one, is to know how to use light and understand how it effects your scene.
To make this more simple I will break it down into three main sections; Soft Light vs Hard Light, Direction of Light, and Motivated Light.
Soft Light vs Hard Light
With the emergence of smartphones, we have become accustomed to hard light on our subjects. For amateur photography this doesn't matter but is one of the first things we need to address if you want to improve.
The reason we want soft light for our photographs is because it allows for a slower falloff to shadow (meaning that there is a smoother transition to shadow). This is much more flattering for subject lighting as it can cover up details in the face and hard shadows on a persons face often makes them look older.
So how do we achieve soft light?
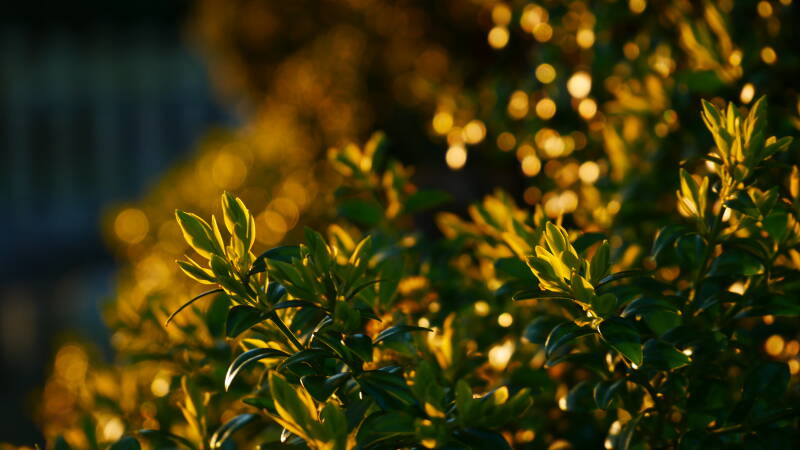
We can either diffuse our main light source, move the light source further away, or in the example I have shown above, wait until golden hour. The golden hour is the hour after sunrise and before sunset.
Golden hour is an incredible time to take photographs as everything is well lit, the shadows will be soft as the sun isn't high in the sky and everything has a "golden" hue to it that saturates earthy colours (browns and greens) really nicely.
Direction of Light
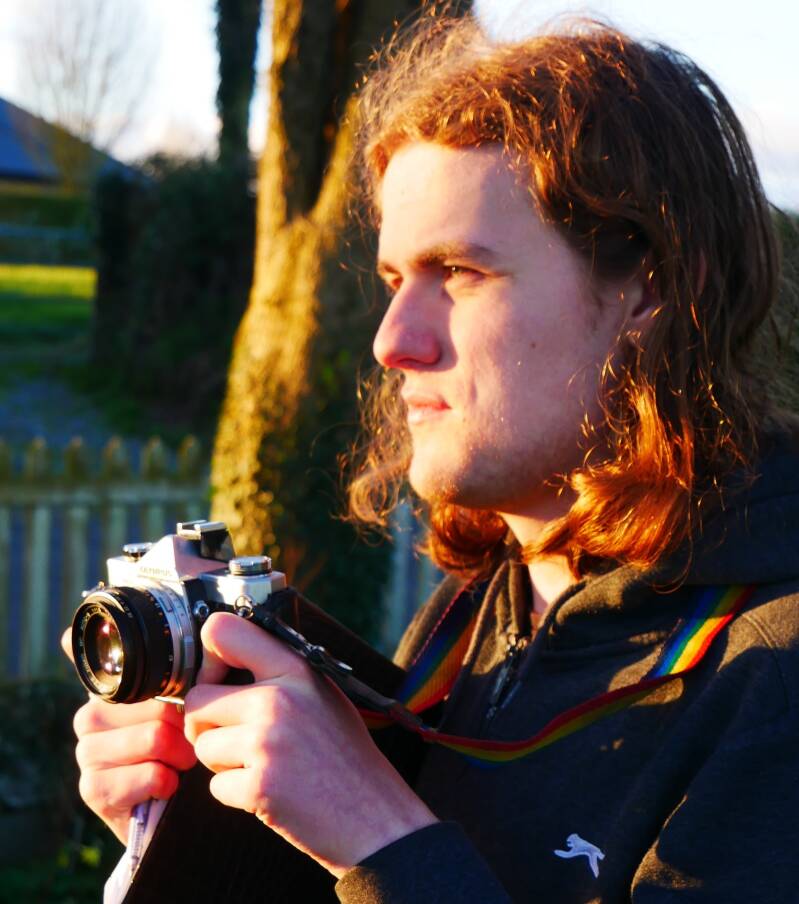
The second most important element of light is where it's coming from. Obviously we can't move the sun but we can choose where to set our camera to make the best use of the natural light.
One of the most important pieces of advice I want to offer you is to experiment with what you can do with the light you have.
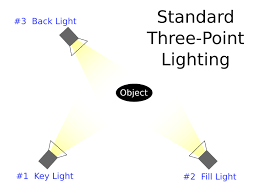
It is important to know how each light functions in a scene. In these portraits you can see the effects of different lighting.
The first light is the "Key Light" which is used for lighting the offside of the subjects face and creating dynamic contrast between what you deem to be the light and dark of the picture.

In the second portrait we can see how the "Back Light" is used to create shape around the subject and separate them from the background.

In the final portrait, the "Fill Light " is used for softening the shadows on the face and lighting the area the camera will shoot.

Generally if we photograph a person, we want to take a picture from the side which has less light. This is called lighting from the upstage. If we didn't do this the shaded part of the subject's face would be hard to see, and it would make them look threatening.
Motivated Light
Motivated lighting is simply when we add elements within the scene to explain your lighting, for example, placing lamps or candles in the shot to try and make the set up look natural.
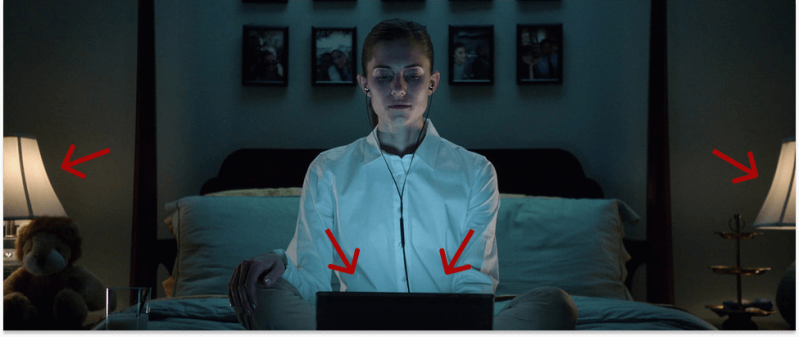
The power of the light prop included in the scene doesn't have to correspond with your light source but it's presence in the scene helps to immerse the viewer.
Remember, when you are doing photography, keep experimenting with your medium and follow your interests.
This blog is the first in a series which will explore different aspects of cinematography, so keep following my posts.
Create Your Own Website With Webador